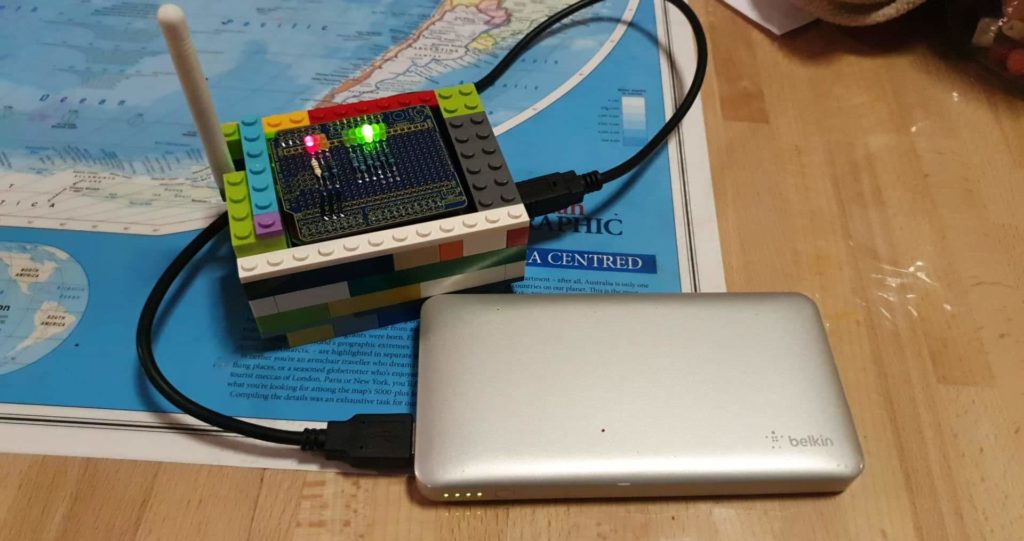
While the kids had the Lego out, I thought that I would pinch some pieces and build a case for my LoRaWAN node. Nothing fancy, random colours but enought to protect the boards from random knocks and bumps.
LoRa Node consisting of an Arduino Uno (bottom), Duinotech LoRa Radio shield (middle) and Freetronics prototyping board (top)
The following is a quick update on the construction of LoRaWAN node., which was perviously described here.
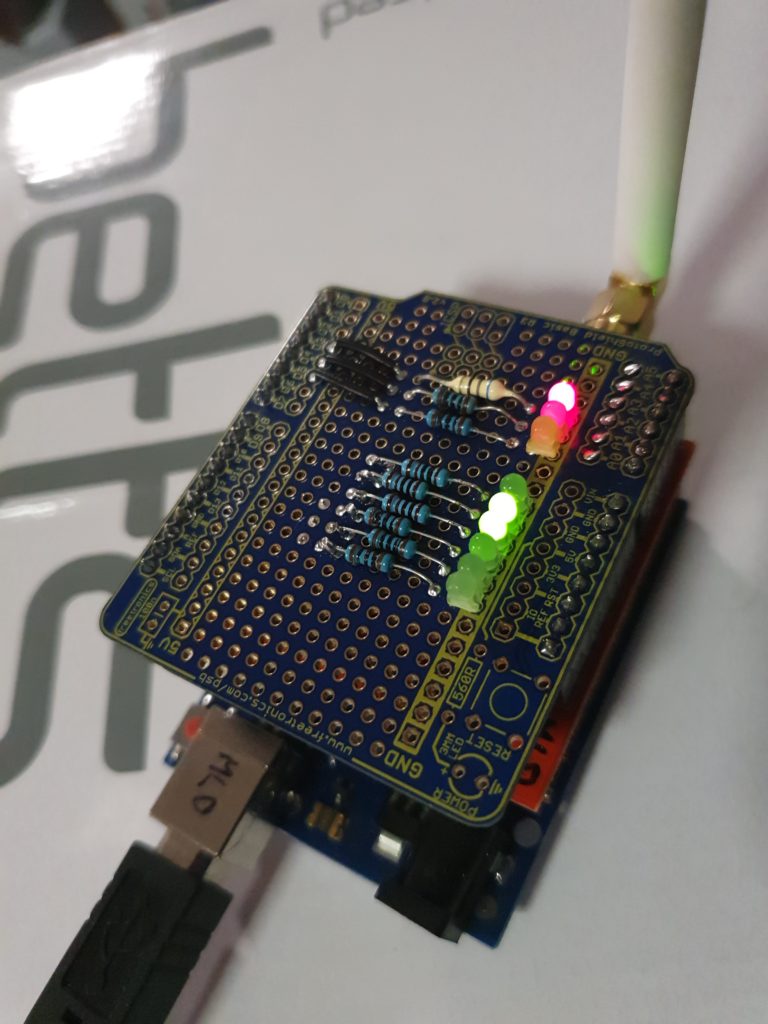
After the previous work and the messing around with the uneven Arduino pins, I ordered some Freetronics prototyping boards and continued with those.
With the first prototype, I had attached LEDs to the first two digital pins (D0,D1) which are also used by the USB Serial connection. These made them kind of useless for monitoring any status, but also interfeared with the Arduino sketch programming. Before a new program could be successfully loaded in this configuration, the board first needed to be removed. This got annoying very quickly, particularly when I enjoy having a fast development process.
In the next design I removed these LED’s and connected them up to the supposibly free and available digital pins (D11,D12 and D13). It appears as though the LoRa radio board also uses at least one of these pins out of the box, with configuration jumpers that use the others. If the configuration jumpers are changed, the software would also need to be changed. The board works as expected out of the box with the available Arduino libraries, so it would be a pity to mess this up. Also, the documentation on the boards jumpers, and their orientation isn’t the clearest, so it would be best just to leave this well alone.
The remnants of this work can be seen on the bottom three resistors seen in the picture above. These resistors were connected with hookup wire underneath to pin D11, D12 and D13.
The Arduinio analog input pins, which were still unuised, can be switch to be used as digital outputs. The three LEDs that were connected earlier to the digital pins, were now connected to Analog pins A0, A1 and A2, with addional LEDs (with resistors, more about that sortly) to A3, A4, and A5. They are connected by more hookup wire underneath the prototype board.
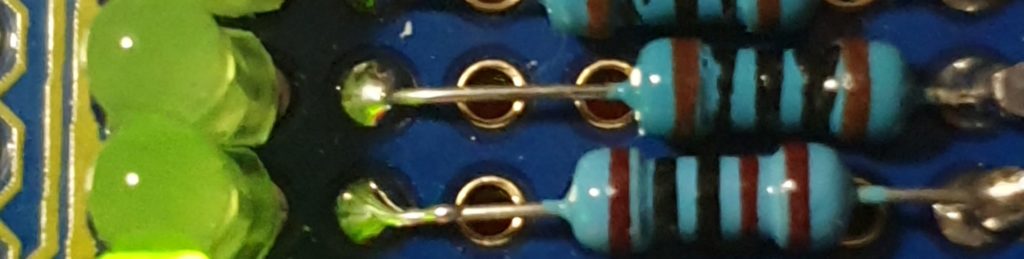
Spot the difference.
A sketch was written to test the connected LED’s and was uploaded, without having to remove the prototype board first. This showed that everything was working as expected, except for one thing. The three new LEDs where significantly dimmer than the first ones.
The three new resistors I had grabbed quickly from my resistor box were 1K (Brown-Black-Black-Brown/Brown), rather than 100 Ohm (Brown-Black-Black-Black/Brown). This ment that the current through the LEDs was less, and hence their brightness was less as well. This has not been fixed in this prototype and probably wont be, although I could solder another suitably size resistor in parallel to the 1K ones to made the combined resistance close to the desired 100 Ohm amount.
The uploaded sketch was still contained the ability to set a couple of LEDs based on a byte of data received from the LoRaWAN radio. This was shown to work from The Things Network web, with the next step being able to drive this from custom software. Data from the LoRaWAN node is accesses via the MQTT protocol, and data can be uplinked to the node using the same method.
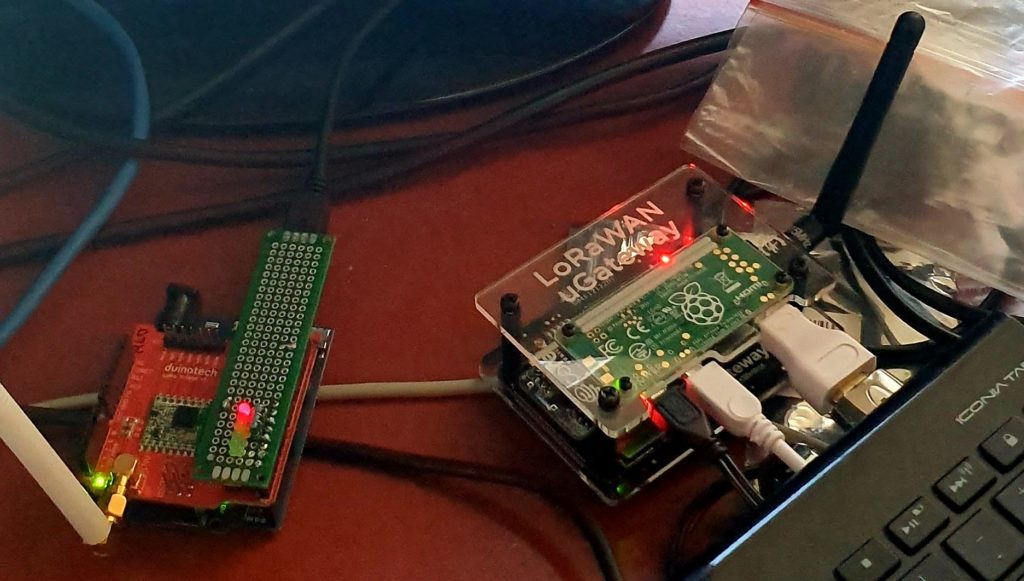
With assistance of the STEM Education resources from the Port Adelaide Enfield Libraries, I have been investigating LoRaWAN devices, how to build them and how they can be used.
There is more investigation to be done, but the node shown in the picture above is able to do the following:
Connect and Authenticate to a LoRaWAN network (The Things Network) via Over The Air Authentication (OTAA); and
Send data (Uplink) and Receive data (Downlink) via the LoRaWAN Gateway(s). (Downlink data is queued, and is received in a window after Uplink data has been received by the network. This reduces power usage in the node.)
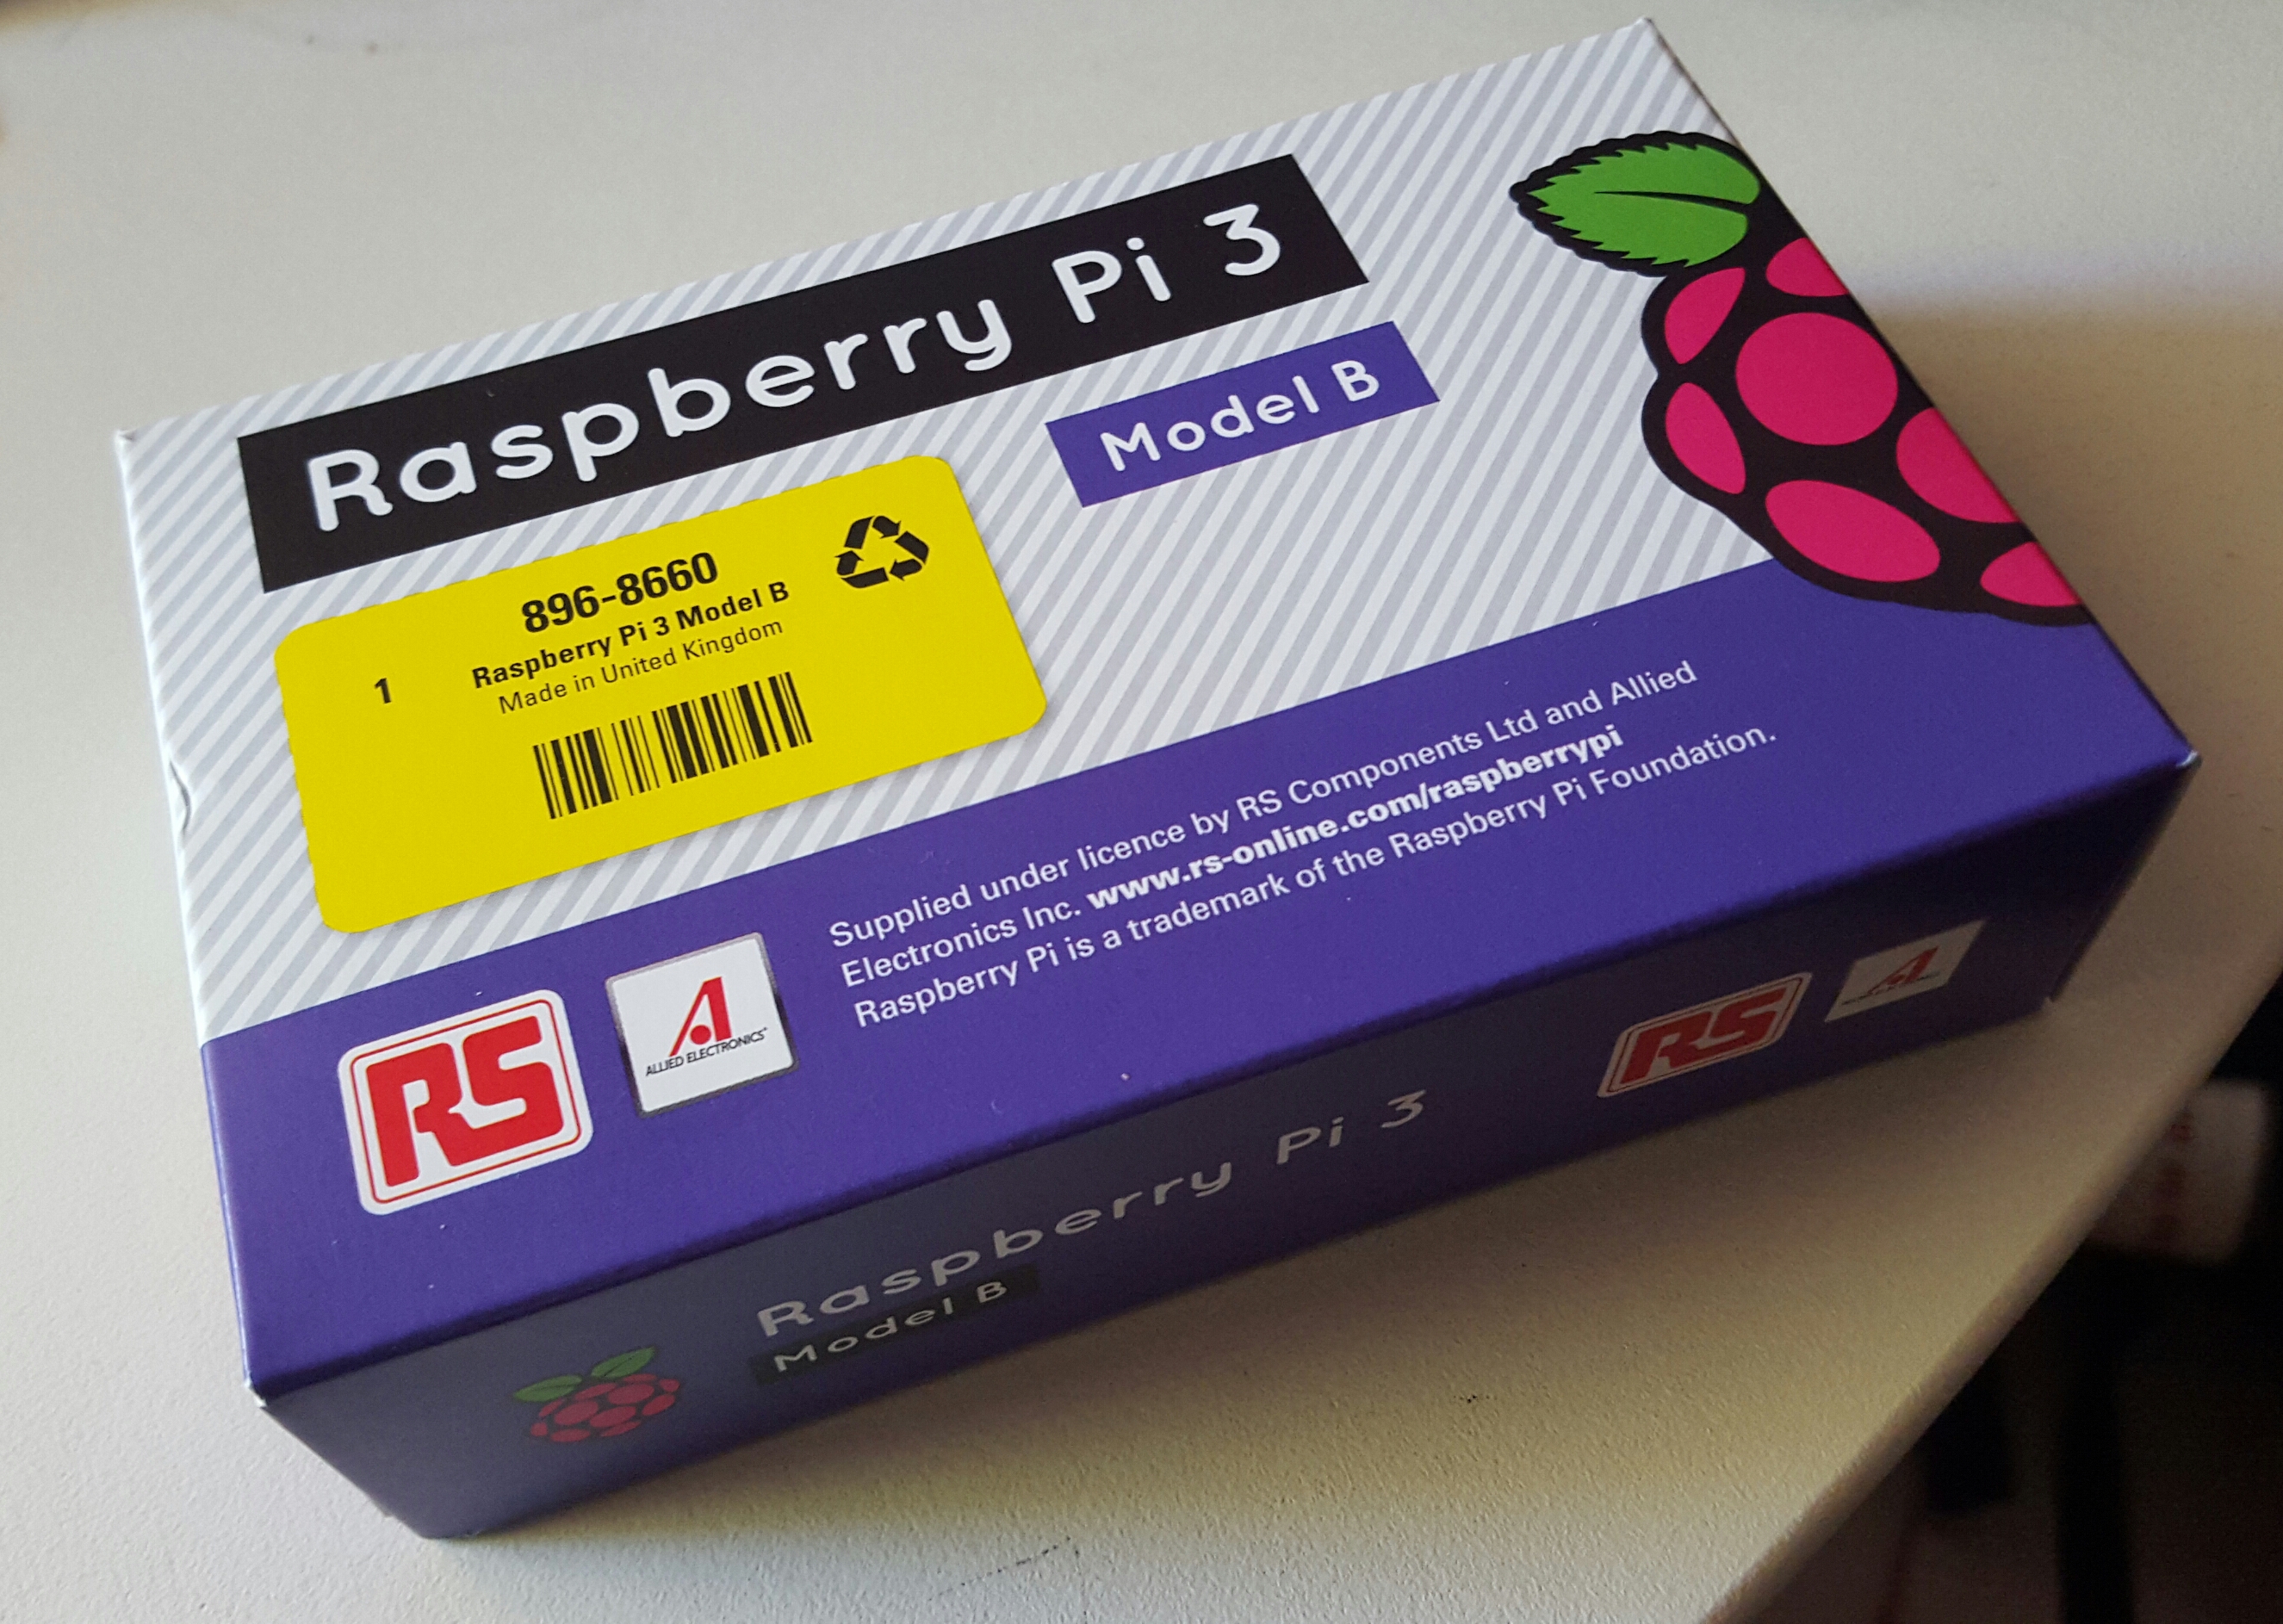
The Node used was the Gragino Arduino Shield (or clone from duinotech)
The Gateway is the uGateway LoRaWAN from Core Electronics. Having a local gateway is not necessary if there is another one in the neighbourhood, within range of your node. There are currently no nodes in my area so an internal gateway was required for development and testing. The other option was to take the Node for a drive in the car after a development session, but this made debugging very tiresom, very quickly.
There are a couple of other useful tools worth mentioning.
TTN Mapper is an Android application that will monitor your device on your smart phone, via The Things Network. It then used your phones GPS to log the position of your device. The result is that you can map the coverage of nearby gateways by using your LoRaWAN node and phone in a similar way to how Wireless Access points used to be mapped (WarDriving). This is useful for knowing where your nodes have TTN access, and where additional gateways might be required.
It’s finally arrived. Twenty years after being promised a community with a broadband infrustructure it has finally been delivered to the Mawson Lakes Parkview Village via NBN’s NFC infrustructure.
It would be interesting someday to get the details of what exactly happened, but the end result was that the early parts of Mawson Lakes had coax cable in the street, which the later parts didn’t. In addition to this, much of the earlier sections were also put on ‘pair-gain’ for their home phone which ment that the new ADSL technology for broadband over their phone line were also not available. Many homes opted for fixed wireless connections, which can be verified by the large number of wireless dishes on the roofs across the neighbourhood.
When we originally bought our property in 1998, it was with the promise by the developer that Mawson Lakes residents would have access to broadband when they moved into their homes. This was before the 2000 Sydney Olympics and the Optus vs Telstra cable wars, which saw large amounts of cable rapidly rolled out across Australia through this period, through to mid-1999.
The Mawson Lakes Foxtel Cable, now HFC Network Area
The developer Delfin, now Lendlease, had made an arrangement with Telstra to do the rollout in Mawson Lakes. When Optus decided to stop, Telstra also stopped it’s rollout nationwide, including Mawson Lakes, even though a separate cotract was in place. My understanding was that the contract commitment by Telstra Delfin was eventually settled out of court for an undisclosed sum..
While having waited so long for the internet service that had originally been promised, I there was happy enough to be able to pre-order the service when this option became available. This ment that finally there was some progress. The order progressed and was eventually booked in for the week before Christmas.
The installation almost happened without any drama whatsoever. A combination of the way the NBN has been designed (as a wholesale business) and the ISP, ment that not only did the process become incredibly frustraiting, but this frustration could easily have been avoided in several different ways, including not making a simple mistake in the first place.
Mistakes happen, this is a reality of life.
In this case, the serial number, or MAC address of the ISP supplied router had been entered incorrctly, presumably by the ISP. I have no way of knowing if this was indeed the case or not, as the NBN technical support person wasn’t allowed to directly talk to me (as I overheard on the second call out), but the problem was solved between the NBN and my ISP in the background while I waited. This is what happens when you pay peanuts for data entry. On the first visit the NBN installation was done and everything from their point of view was working as expected, so the technision left. The router was ment to self-configure, which it didn’t, so several calls were made to the ISP and a second NBN callout was eventually made four days later.
In the meantime, on the day that the NDN as provisioned, my perfectly functional ADSL service was disabled and the login removed. After several calls, I was able to get a temporary login setup for this service so the family could atleast have internet access over Christmas. ATt this point the problem with the NBN service had yet to be identified. A further call to the ISP was required as they then attempted to bill me for the temporary.
In sort, not only did I fail to get a working ISP/NBN service, but the existing functioning ADSL service was cut off, with no expectation given on when any of the issues would be resolved.
Amongst all of this rant, there are a couple of highlights. I can report that there are still some knowledgable tech support people around who know the systems well enough to fix an issue without following a script. They are rare though. I hope they are being paid enough.
A recent project has been pulling together some code for a Raspberry Pi Zero, which is going to be part of the system in the a Cosmic Ray Sensor. Details about the The Cosmic Array project, which is part of the Splash Adelaide Winter Festival are available from the Hackaday Website.
The Raspberry Pi takes events from the sensor and plays chimes depending on the direction that the detected muons appear to come from (via a coincidence circuit).
Just got off the phone from Salisbury Council about the road works an detours that are going on around the place. I got caught out yesterday, doing a last minute ‘Oh we all slept in!” dash, and ended up going a lot further than we needed to.
The details that I have:
Mon, 30th May – Fri, 10th June: Mawson Lakes Boulevard – Closed from Parkway to Mary Street (Montague Road end). North detour back via Parkway in Technology Park.
Mon, 6th June – Thu, 16th June: Mawson Lakes Boulevard – Works at the Peninsula Drive and Parkway Drive Roundabouts.
Hopefully these two road closures won’t overlap by too much.
Just had a letter in the mailbox with more details, and I have rung Adrian, the Surfacing Coordinator to confirm access during these times. The plan at the moment(1 June) subject to weather:
Monday – Work starts on Peninsula Roundabout, Work starts on Parkview Dr. Roundabout.
Tuesday – Work starts on Parkview Dr.
Wednesday – New Asphalt put down on Parkview Dr.
Local access will not be completely cut off during this time, works start at 7am, but there may be some delays getting in and out of adjoining roads. Access will be available after 5pm each day. Direction will need to be taken by road management services.
I will continue to update this post if I find out any more details
This author is very please to announce that we were successful and won the event with our project: City wide water leakage monitoring. We were us against the 10 Cent – Internet of trash and an Interactive Electronic Notice Board. The decision was very tough according to the judges.
The prizes include access to IBM’s IoT and Cloud platforms. We will be updating the Hackaday page above with more details as we progress with the project.
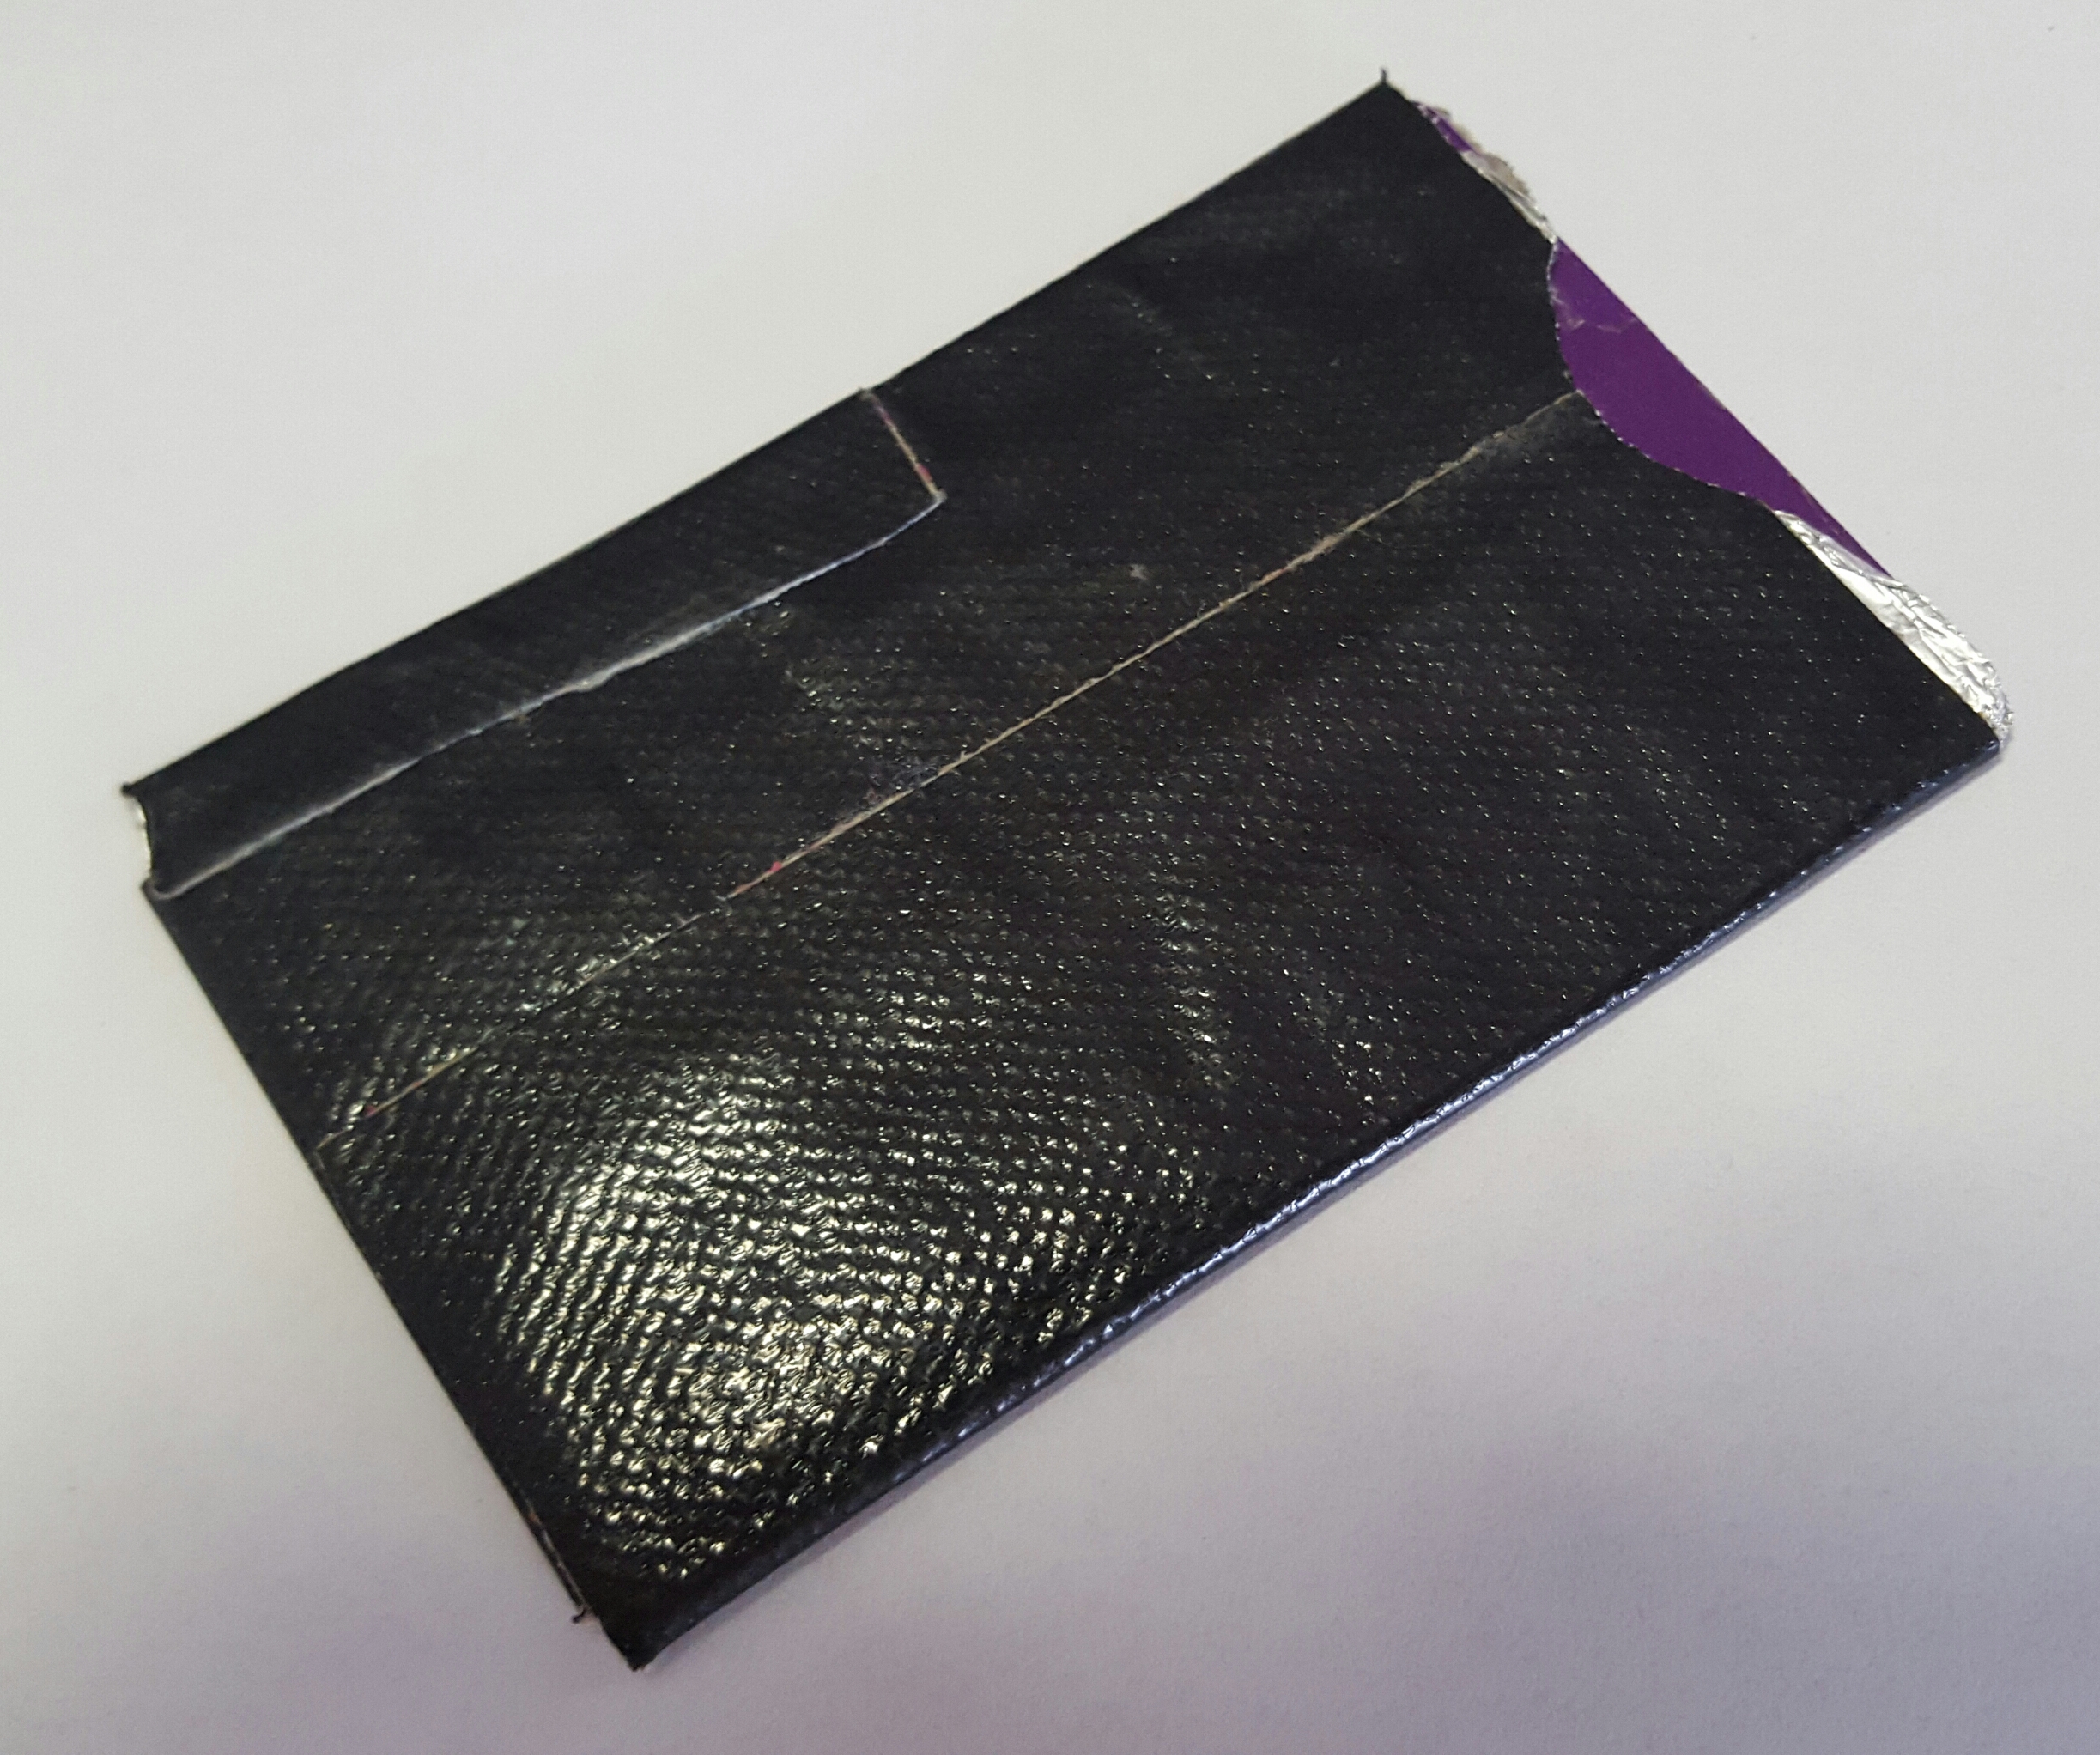
The other day my phone (a Samsung S5, no, not the edge) started beeping at times when I was holding it. This began expectantly, and after a week of these obscure notifications, I tracked it down to when the phone was being placed next to my wallet. An App that I recently installed turned on the Near Field Communication (NFC) features on my phone, which ment that it was now registering my credit cards when they got close enough, through the outside of my wallet.
After turning of the NFC feature on the phone, I had a quick google on ‘RFID Card Shield’ and came up with a card sleeve (see picture) that works quite effectively.
The sleeve is made up of several layers of aluminium foil, for strength and cut to size, and wrapped in gaffatape.
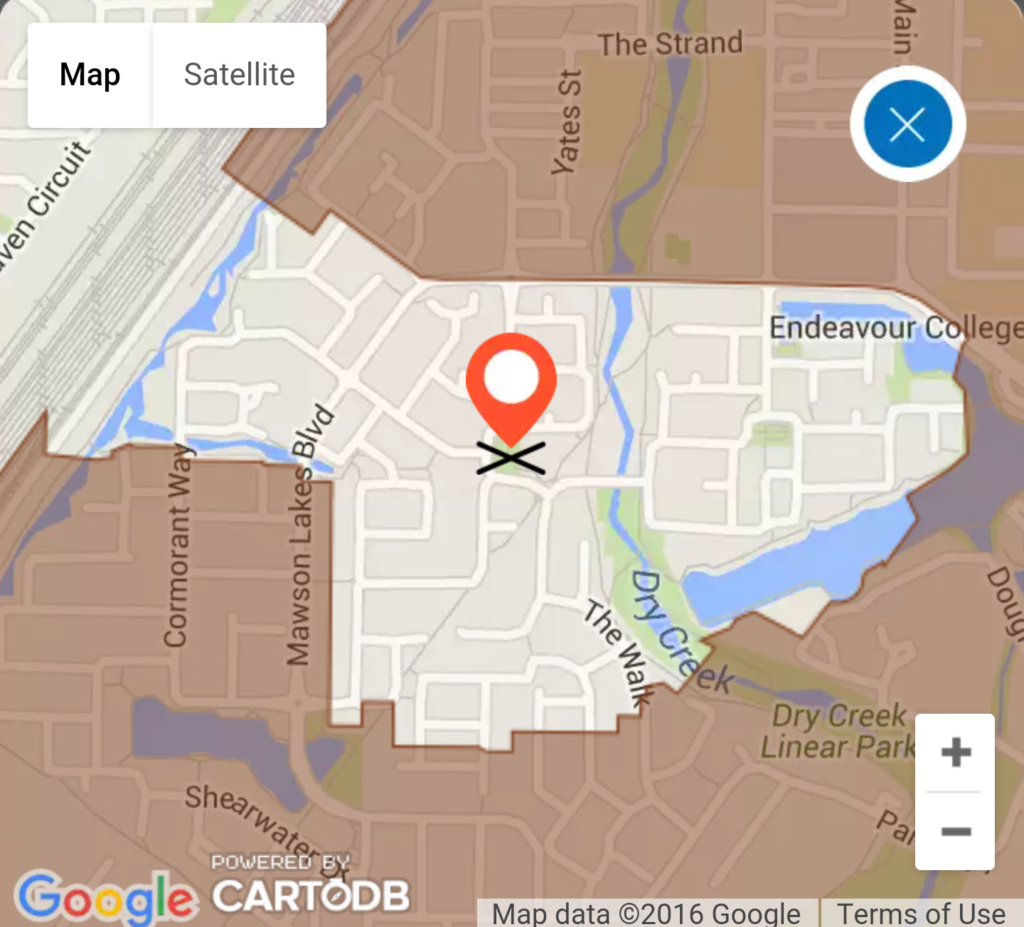
Not sure why our particular location has been left out of the NBN rollout information (see image). Last month we received a generic notice saying that we may see the NBN doing work in our streets, so there is some confusion out there about this.
It looks as though there is a high-tech force field (a dome?) over our suburb which is keeping the NBN out.
I have just been introduced to the Edison Robots. I was shown a box of them that are going to be used to teach programming(coding) and robotics in a local primary school. They looked vaguely familiar.
The company behind the Edison is Microbric and they have been around for a while. They concluded an Kickstarter campaign in 2014, raising over $100,000. Somehow I missed this campaign at the time, but they managed to raise enough to create a ‘block based’ programming environment for the robots what will run in a browser, Windows, iOS, Android and Linux (including on the Raspberry Pi).
I had to delve a little deeper on the programming side though. I had dealt with the original Microbric robots, which could have a programming cable attached, but weren’t really programmable. They came with some pre-programmed actions, like ‘follow the line’, as well as playing the theme songs of the local AFL Football teams. The way these programs were selected was also novel. They could be made to run over and read a barcode which was read by a light sensor. It was also possible to hold them up to a computer screen, but this was a little bit unreliable. A the time I tried to manually decode the barcodes, but without success. There was a programming cable available (based on a Nokia phone cable) but it’s use was unsupported at the time I was looking at it. I don’t know if this ever changed.
On the other hand, programming the Edison with the Edware software is a great addition and a great introduction to robotic programming for students. The software is Python based under the hood, is available under a Free and Open Source license (GPLv2) and is available on Github.
Some things I would like to try with the Edison:
Attach a pen and get the robot to write a message, or draw a picture.
The MeetEdison website recommends the following Lego Kit –42032 Compact Tracked Loader – as a good way of getting parts useful for building more advanced robots and machines. Details are in the EdBook3.